Let’s get the uncomfortable truth out of the way immediately. If you do facial cupping incorrectly, specifically, if you leave a suction cup stationary on your cheek for even three seconds, you will look like you lost a fight with an octopus.
I’ve seen it happen. I’ve fixed the aftermath. And yet, despite the risks of “hickey face,” this ancient modality remains one of the most effective tools for immediate skin brilliance.
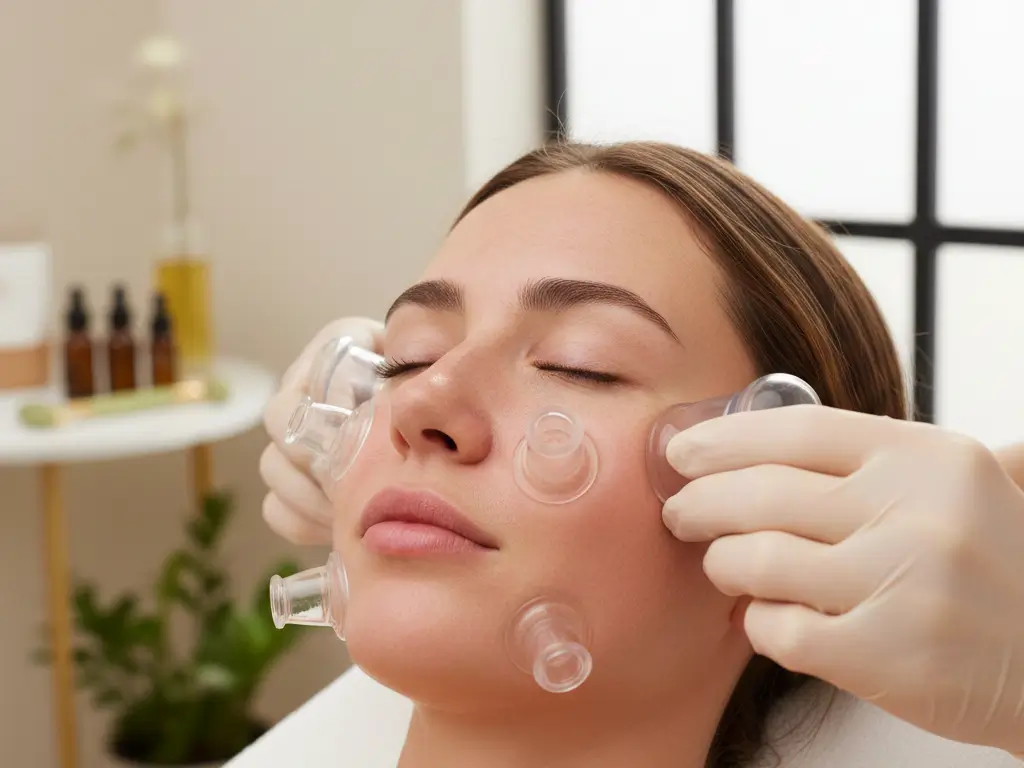
Facial cupping is a technique that uses small suction cups to stimulate skin and muscles. It increases local blood circulation, relaxes facial tension, and encourages lymphatic drainage.
But is it “natural Botox”? No. Botox paralyzes muscle; cupping wakes it up and moves fluid. They are opposites.
If you are looking for a way to sculpt your jawline, reduce morning puffiness, and get that “glass skin” glow without needles, this is your toolkit. But you need to respect the anatomy of your face.
Here is how to do it without bruising your ego or your skin.
What Is Facial Cupping Actually Doing? (The Mechanics)
Facial cupping uses negative pressure (suction) to lift facial tissue, separating the fascia from the muscle. This vacuum effect increases microcirculation, bringing oxygenated blood to the surface, while mechanically draining stagnant lymph fluid to reduce puffiness. Unlike body cupping, the cups must keep moving to prevent bruising.
It’s Not About “Pulling”
Most beginners think the goal is to pull the skin up to lift the face. That’s a mistake.
The real magic is happening underneath the dermis. The suction creates a separation between tissue layers. Think of your facial layers like a tightly made bed. Stress and tension glue these sheets together. Cupping fluffs the sheets, allowing fluid (lymph and blood) to flow freely again.
When I first started testing facial tools, I didn’t understand this distinction. I thought harder suction meant better lifting. I was wrong. Light suction that glides smoothly is far more effective for lymphatic drainage than aggressive tugging.
The “Glow” Explained
That instant radiance you see after a session isn’t magic. It’s biology. You are physically forcing fresh, nutrient-rich blood into the capillaries of your face. This oxygenates the tissue and encourages the production of collagen over time.
For a deeper dive into tools that manipulate blood flow, you might compare this to gua sha, which uses scraping pressure rather than suction. Both work, but cupping is often easier for beginners to master.
Choosing Your Tools: Glass vs. Silicone
For beginners, silicone cups are safer and easier to control. They are durable and allow you to squeeze to adjust suction. Glass cups with rubber bulbs offer a more professional glide and are easier to keep sterile, but they break easily. Start with a kit containing at least two sizes: small for eyes, large for cheeks.
The Material Matters
I’ve used everything from cheap Amazon plastic sets to high-end hand-blown glass. Here is my breakdown:
| Feature | Silicone Cups | Glass Cups (with bulb) |
| Control | High (Squeeze to grip) | Medium (Bulb pressure) |
| Hygiene | Porous (Can trap bacteria) | Non-porous (Easier to clean) |
| Durability | Indestructible | Fragile |
| Glide | Good | Excellent |
| Best For | Beginners & Travel | Home Spa Rituals |
If you are just starting, grab a silicone set. They are forgiving. If you squeeze too hard, you can just let go. Glass cups feel luxurious and look great on a vanity, but dropping one on a tiled bathroom floor is a mistake you only make once.
Regardless of the material, hygiene is non-negotiable. You are moving lymph and increasing blood flow; the last thing you want is to drive bacteria into your pores. Wash your tools with warm, soapy water after every single use.
The Prep: Slip Is Survival
Never perform facial cupping on dry skin. You must apply a facial oil to create “slip.” This allows the cup to glide without dragging or tearing the skin. Use a generous amount of oil, more than you would for moisturizing. Jojoba, squalane, or rosehip oils are ideal because they don’t absorb too quickly.
The “Drag” Danger
Attempting this on dry skin is the fastest way to damage your capillaries. You need a buffer.
You want an oil that sits on top of the skin for a few minutes. If you use a water-based serum or a fast-absorbing cream, it will vanish before you finish your forehead.
My Go-To Recommendation:
I prefer pure plant oils for this. Facial oils like Jojoba are chemically similar to human sebum, making them safe for most skin types. If you are acne-prone, stick to high-linoleic oils like Hemp seed or Grapeseed oil to avoid clogging pores while you glide.
Pro Tip: Apply the oil to your neck as well. You will be draining fluid down there, and you don’t want the cup to get stuck on your collarbone.
How to Perform Facial Cupping Safely (Step-by-Step)
- Cleanse skin and apply oil generously.
- Squeeze the cup, place it on the skin, and release slightly to engage suction.
- Immediately glide the cup upwards and outwards.
- Release suction when you reach the hairline.
- Never leave the cup stationary.
- Repeat 3 times per section.
- Finish by draining down the neck.
1. Open the Drains (The Neck)
This is the step everyone skips. Your lymph nodes are the drainage pipes. If the drain is clogged, the fluid has nowhere to go.
Start at the clavicle (collarbone). Use light suction and glide up the side of the neck to the ear, then glide down. This clears the path. If you are concerned about the firming of your neck and décolletage, this step serves a double purpose.
2. The Jaw and Chin
Use the larger cup. Start at the center of your chin. Squeeze, suction, and glide along the jawline toward the ear.
- Crucial: When you reach the ear, break the suction before you pull the cup off. Do not “pop” it off aggressively like a cork.
3. The Cheek Sculpt
Start at the corner of the nose (not on it) and glide underneath the cheekbone toward the ear. This is the “contour” line. Then, move slightly lower and glide across the cheek.
This movement helps address nasolabial folds, though it won’t erase them overnight. It helps plump the area by rushing blood to the surface.
4. The Eye Area (Be Gentle!)
Switch to the smallest cup. This skin is paper-thin.
Use barely any suction, just enough to keep the cup attached. Start at the inner corner of the under-eye and glide out to the temple. This is incredible for botanical solutions to under-eye puffiness, as it physically pushes the fluid bag away from the eye.
5. The Forehead Frown
Use the large cup again. Start at the brows and glide vertically up to the hairline. This relaxes the frontalis muscle (the one that causes horizontal forehead lines). You can also glide horizontally from the center of the forehead out to the temples.
6. The Flush
Once you have worked the whole face, do a final sweep down the side of the neck to the collarbone. You’ve moved all that waste fluid to the side of your face; now you need to dump it into the lymphatic system so your body can process it.
Frequency and Risks: When to Stop
Limit facial cupping to 2-3 times per week. Over-cupping can damage collagen fibers and potentially lead to skin laxity over time. Avoid active acne, rosacea, or sunburned skin. If you bruise, you are using too much suction or moving too slowly.
Can It Cause Sagging?
There is a persistent myth that stretching the skin causes sagging. Chronic, heavy stretching? Yes. Controlled, light gliding? No.
However, moderation is key. If you do this every day with high suction, you risk stretching the elastin fibers faster than they can bounce back. Treat it like a workout. Your muscles need rest days.
The “No-Go” Zones
Do not cup over:
- Active Acne: You will rupture the bacteria sac and spread it. If you are dealing with breakouts, look into clean beauty for sensitive or acne-prone skin instead of mechanical stimulation.
- Broken Capillaries: If you already have spider veins, suction will make them worse.
- Fresh Botox/Fillers: Wait at least 4 weeks after injections. You don’t want to move the filler around before it settles.
Benefits Beyond the Mirror
Beyond aesthetics, facial cupping relieves sinus congestion, reduces jaw tension (TMJ), and can help with headaches. By increasing blood flow, it also aids in the absorption of skincare products applied afterward. It creates a natural, healthy flush that makeup cannot replicate.
Sinus Relief
If you suffer from seasonal allergies, cupping is a lifesaver. The mechanical movement helps drain the sinus cavities. I’ve had clients tell me their ears popped (in a good way) during a session because the pressure regulation finally shifted.
Product Absorption
After a session, your skin is warm and the circulation is humming. This is the perfect time to apply your high-performance actives.
If you layer a peptide serum or a high-quality moisturizer now, it will penetrate deeper than on cold, stagnant skin. Just avoid strong acids (like glycolic peels) immediately after, as your skin may be sensitive.
Tension Release
We hold immense tension in our jaws. Running the cup along the masseter muscle (the chewing muscle) can feel intense but incredibly relieving. It’s like a deep tissue massage for your face.
Managing the Aftermath
After you finish, your skin will look red. Do not panic. This is erythema (redness caused by increased blood flow), and it’s actually the goal. It means fresh oxygen is flooding the tissue.
The redness should subside within 10 to 30 minutes.
What to Do Immediately After:
- Drink Water: You just moved a lot of lymph (waste fluid). Hydrate to help your kidneys flush it out.
- Cool Down: If the heat feels too intense, you can use an ice roller to soothe the skin and seal the cuticles.
- Clean Your Cups: I cannot stress this enough. Oil + dead skin inside a cup is a petri dish.
Troubleshooting: “I Bruised My Face!”
If you wake up with a circular mark, you likely paused the cup.
- The Fix: You can’t erase it instantly, but you can speed up healing. Apply Arnica gel or a compress.
- The Lesson: Next time, keep it moving. If you need to stop, break the suction first.
You might also notice small red dots (petechiae). This means the suction was too strong for your capillary strength. Back off the pressure next time. Interestingly, using ingredients that support skin barrier health, like Centella Asiatica (Gotu Kola) or localized application of botanical butters, can help strengthen the skin over time, making it more resilient.
Facial Cupping vs. Other Tools
Is this better than a roller? It depends on the goal.
- Facial Roller: Good for surface cooling and very light drainage. Foolproof.
- Gua Sha: Excellent for deep muscle tension and sculpting. Requires more technique.
- Cupping: Superior for plumping, intense circulation, and rapid de-puffing.
If you are trying to minimize the appearance of marks or encourage tissue regeneration, cupping shares some benefits with natural methods for reducing scars by bringing fresh blood to the area, though it won’t resurface skin like laser would.
Creating a Routine
Don’t overcomplicate it. Here is a realistic schedule:
- Monday: Facial Cupping (Deep drainage to start the week).
- Wednesday: Gua Sha (Sculpting).
- Friday: Light hand massage or facial rolling.
- Weekend: Rest. Let your skin breathe.
Integrating this into your regimen requires understanding where it fits. It should always come after cleansing and before your final heavy creams. For a broader look at how to structure these steps, check out this guide on skincare layering.
Final Thoughts
Facial cupping is powerful because it works with your body’s hydraulic system. It’s not about erasing 20 years of aging in 10 minutes. It’s about restoring flow.
When fluid flows, stagnation leaves. When stagnation leaves, puffiness vanishes and cheekbones reappear.
Start with silicone cups. Use more oil than you think you need. And please, for the love of your social life, keep that cup moving.
If you are ready to explore more about holistic skin health, visit Beauty Healing Organic for deep dives into natural ingredients and tools that actually work.
- Buy a simple silicone cup set. Do not splurge on glass until you master the technique.
- Test your oil. Make sure it doesn’t sink in within 30 seconds.
- Try one side of your face first. Compare the difference in the mirror. That instant lift? That’s the motivation you need to finish the other side.